I've always thought it was unfair that burnt orange gets shelved on November 1st — it's one of the most flattering, versatile shades in the whole polish spectrum. That warm terracotta-ember tone works from early fall straight through winter, pairing with camels, browns, creams, and blacks like it was made for them. In this roundup I'm sharing 18+ burnt orange nail designs I've worn well past Halloween: tortoiseshell, retro swirls, marble effects, chrome finishes, and chic minimal accents. Each design includes my color and technique notes, when I wear it, who it suits best, and a practical application tip. Consider this burnt orange's redemption arc.
Burnt Orange Solid Crème

I wear burnt orange solid crème from September through February because it's the perfect warm neutral. A rich terracotta-ember crème in two coats — the color does everything, no art needed. It suits every skin tone; on fair skin it's striking, on deep skin it's tonal and rich. I find it especially flattering on short to medium nails. This is my everyday fall shade with camel coats and brown boots. My application tip: burnt orange can look streaky in thin formulas, so I choose a well-pigmented crème and apply medium coats. Two full coats, then glossy top coat — the shine is what makes terracotta look expensive rather than flat. Clean up carefully; orange residue shows on skin.
Tortoiseshell Tips

I do tortoiseshell in burnt orange tones when I want the chicest fall nail. The technique: amber-orange base, then irregular blobs of dark brown and black layered while wet so they melt together like real tortoiseshell. I do it as French tips over nude, or full nails for drama. This suits medium to long nails where the pattern has room. I wear it all fall — it's my signature October-through-December look. My application tip: work while the base is wet — that's the whole trick. Blob the dark colors on with a dotting tool and let them spread naturally; don't over-blend or it turns muddy. Two thin top coats smooth the layered polish. Tortoiseshell looks best slightly irregular, so embrace the organic shapes.
Retro Swirls

I paint retro swirls in burnt orange, brown, and cream for 70s fall vibes. The base is warm cream, then I add flowing wavy lines in burnt orange and chocolate — different curves on each nail, like a vintage poster. It's playful and artsy. This suits medium nails and anyone with a retro style. I wear it to fall festivals and casual weekends. My application tip: use a long striping brush and keep your wrist loose — stiff swirls look forced. I plan one flowing line per nail first, then add a second in the contrasting color. The lines should vary in thickness; press slightly harder on curves for organic width. Glossy top coat unifies the retro look.
Burnt Orange Marble
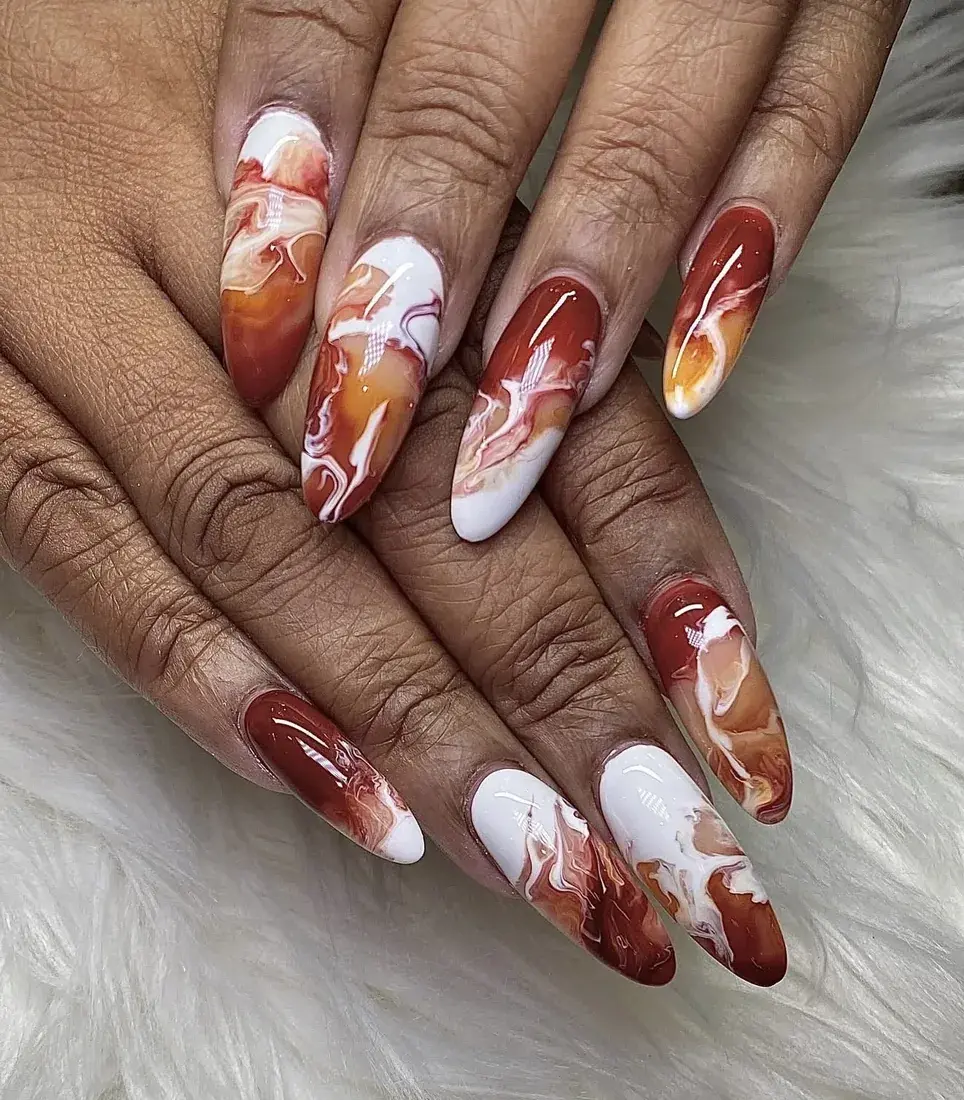
I create burnt orange marble with the water-marble or drag technique for stone-like depth. Drops of burnt orange, cream, and brown on the nail, then dragged with a toothpick into marble veins. Each nail is a unique agate slice. This suits medium to long nails where the marble has space to develop. I wear it when I want an artistic statement. My application tip: work fast — the polish must be wet to drag. I do one nail at a time, dropping 3-4 colors close together, then one confident toothpick drag through the center. Less dragging is more; overworking muddies the veins. Clean up the cuticle area immediately with acetone since marbling is messy. Glossy top coat makes the marble look like polished stone.
Matte Terracotta

I wear matte terracotta when I want burnt orange with a modern edge. The same rich ember shade with a matte top coat looks like clay — earthy, chic, very 2026. Matte makes the warm tone feel contemporary rather than retro. This suits short to medium nails and minimalists. I wear it as an everyday fall neutral. My application tip: matte shows every imperfection, so I buff smooth and apply thin even coats. The matte top coat goes on in one pass — reworking creates patches. Terracotta matte can look dusty if the base is uneven, so I do three thin color coats. Avoid cuticle oil on the matte surface for the first day; refresh the matte top coat weekly.
Burnt Orange Chrome
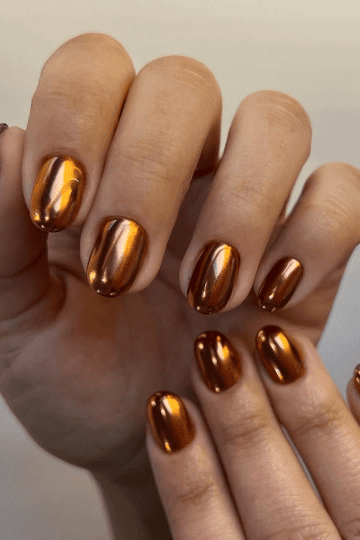
I do burnt orange chrome for a molten-metal fall look. Copper-orange base with orange-gold chrome powder rubbed over — it looks like liquid copper. Absolutely stunning in autumn light. This suits medium to long nails where the reflective finish shines. I wear it to fall evenings out and Thanksgiving dinner. My application tip: the base should be a warm copper-orange for the richest chrome effect. Buff the base perfectly smooth — chrome shows everything. Rub the powder in small circles with a silicone applicator until mirror-like, then seal the free edge twice. Chrome wears fastest at the tip, so that double seal extends the manicure by days.
Half-Moon in Cream and Ember
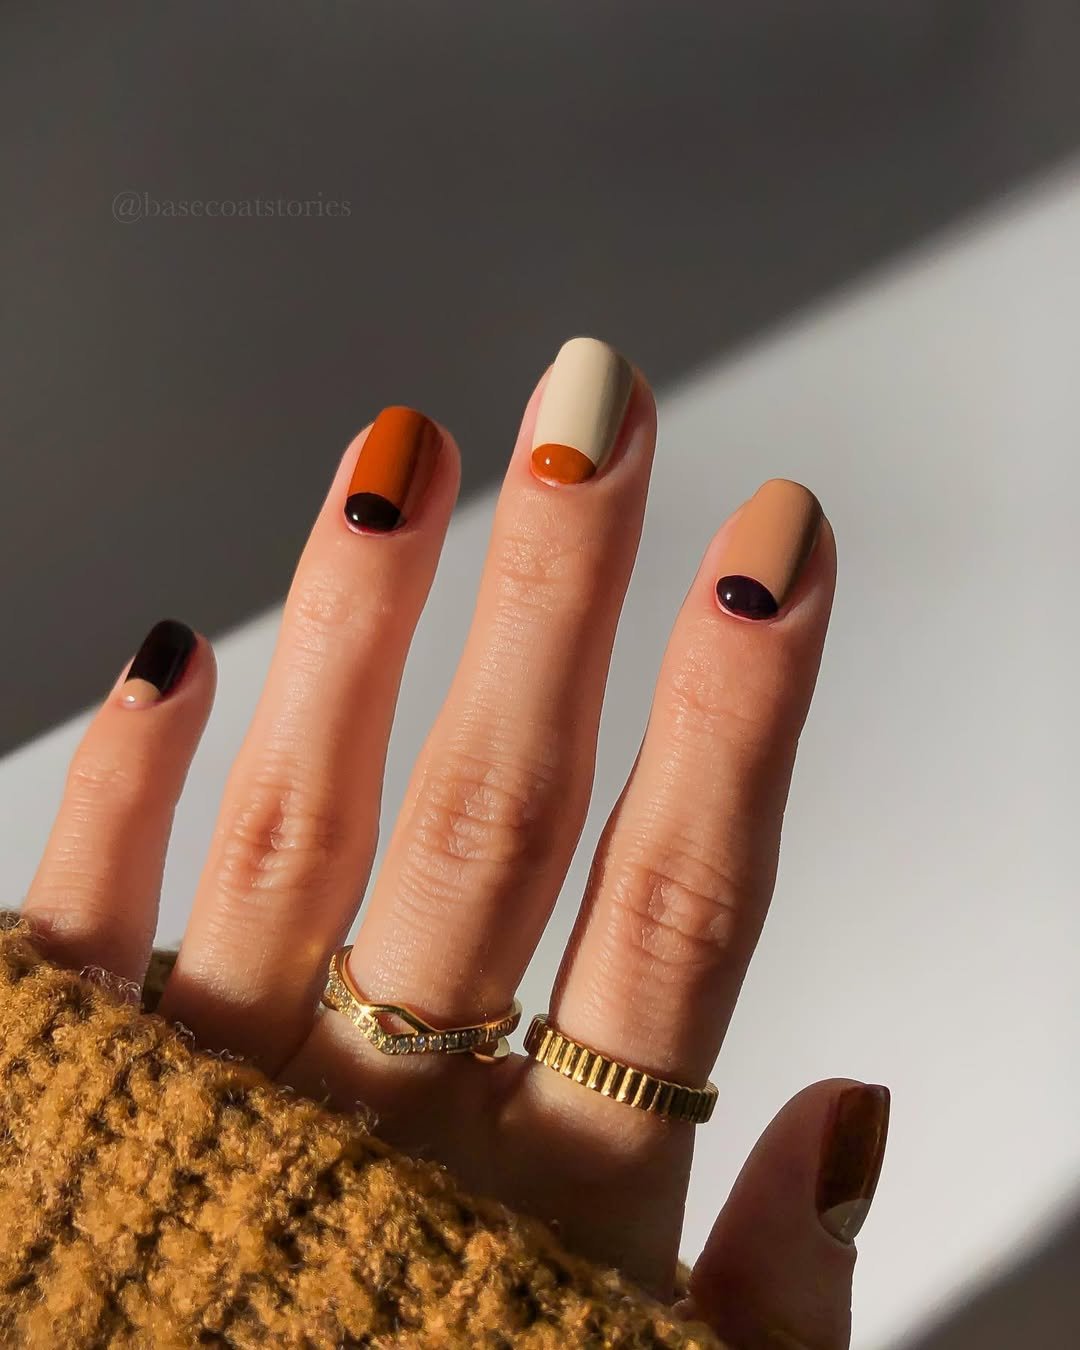
I paint half-moons in cream over burnt orange for vintage-inspired chic. Burnt orange base, then a cream half-moon at the cuticle — the classic reverse French. It looks like 1940s glamour in fall colors. This suits short to medium nails; the half-moon elongates the nail bed visually. I wear it to fall parties and retro-themed events. My application tip: use hole-reinforcement stickers as guides — place them over the dry orange base near the cuticle, paint cream over, peel while tacky. The sticker gives a perfect curve every time. Make sure the orange is fully dry before placing stickers or they'll lift the base. Seal with glossy top coat.
Burnt Orange French Tips
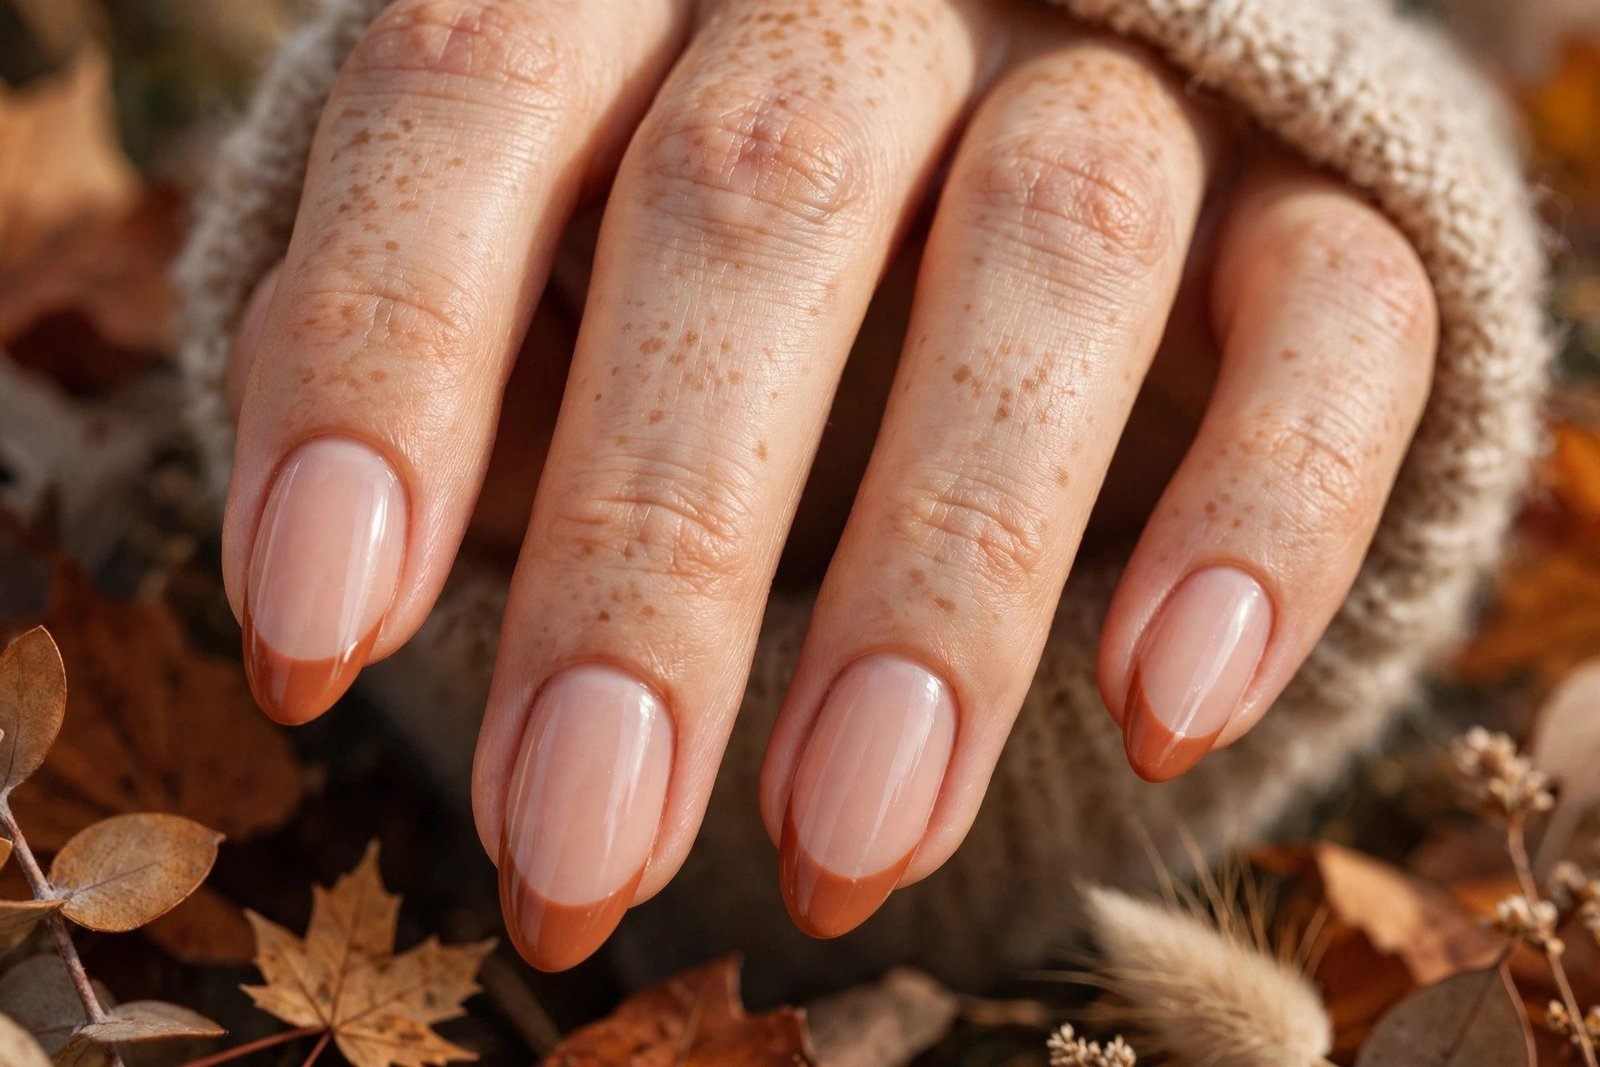
I wear burnt orange French tips as my fall version of the classic. Sheer nude base with rich terracotta tips — warmer and more seasonal than white tips, but just as clean. It's professional enough for work and festive enough for fall. This suits every nail length; on short nails keep the tip thin. I wear it all fall as my polished everyday look. My application tip: the terracotta must be opaque in two coats or it looks washed out against the nude — choose a pigmented formula. Use guide stickers for crisp smile lines and peel while slightly tacky. The nude base should be warm-toned to harmonize with the orange tip; cool nudes clash.
Tortoiseshell Full Set
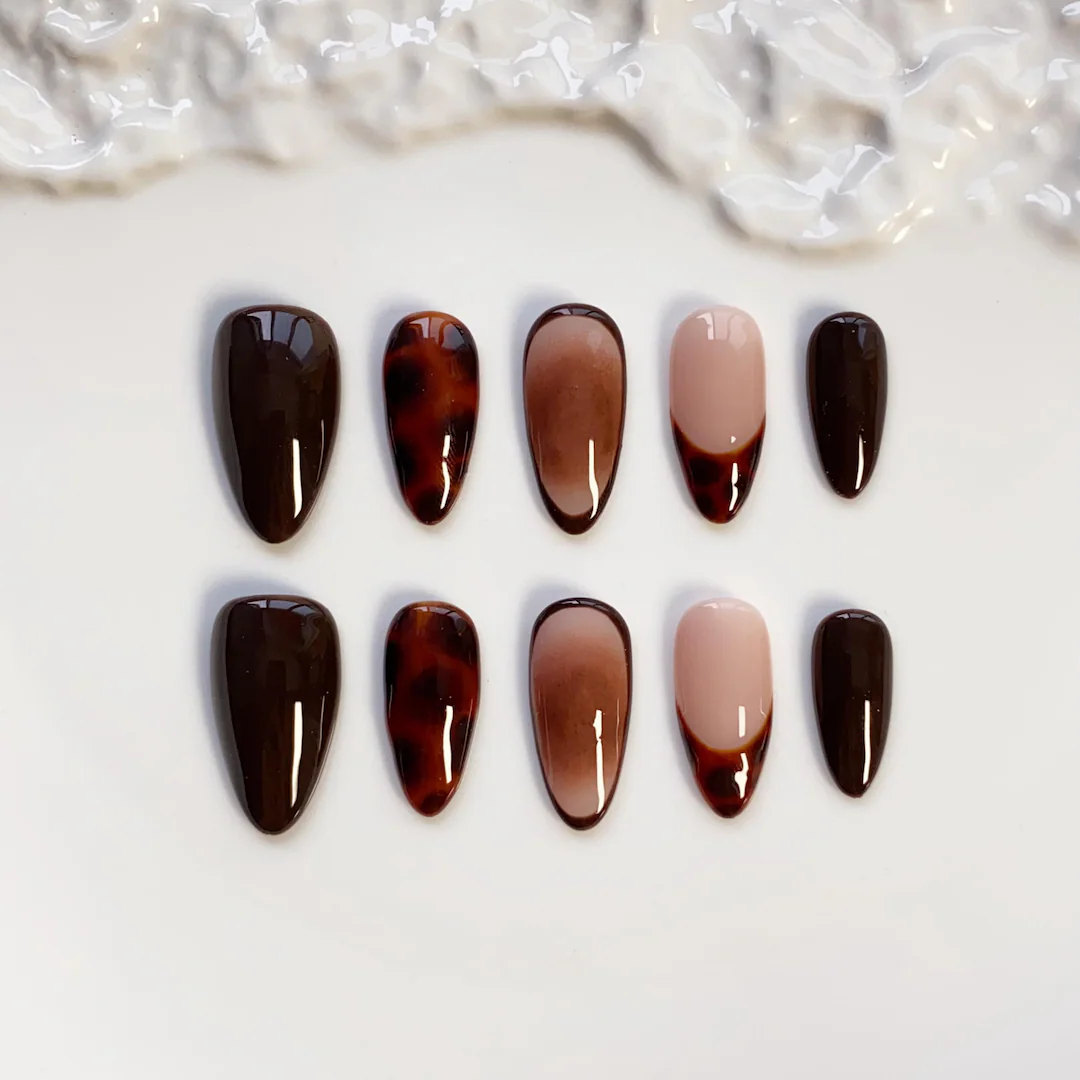
I commit to a full tortoiseshell set when I want maximum fall impact. All ten nails in the amber-brown-black melted pattern — it looks like luxury accessories for your hands. Rich, warm, endlessly wearable. This suits medium to long nails. I wear it from October through the holidays; it pairs with leopard print and gold jewelry perfectly. My application tip: batch the process — do all nails' amber base first, then go back and add the dark blobs while each base is still workable. Actually I work two nails at a time to keep the base wet enough to melt. Consistent blob placement across nails makes the set look cohesive. Two glossy top coats for that resin-like tortoise shine.
Ember Ombré

I sponge an ember ombré from deep brown at the cuticle to bright burnt orange at the tip — like coals glowing. The gradient has real depth and warmth. This suits medium to long nails for the full color transition. I wear it to fall bonfires and cozy evenings. My application tip: use three shades — dark chocolate, burnt orange, and a brighter ember — sponged in bands and blended. The middle shade is essential for a smooth transition. Dab, don't drag, building in thin layers. Liquid latex around cuticles saves cleanup time. Glossy top coat intensifies the ember glow; the shine is what sells the coal effect.
Checkerboard in Orange and Cream
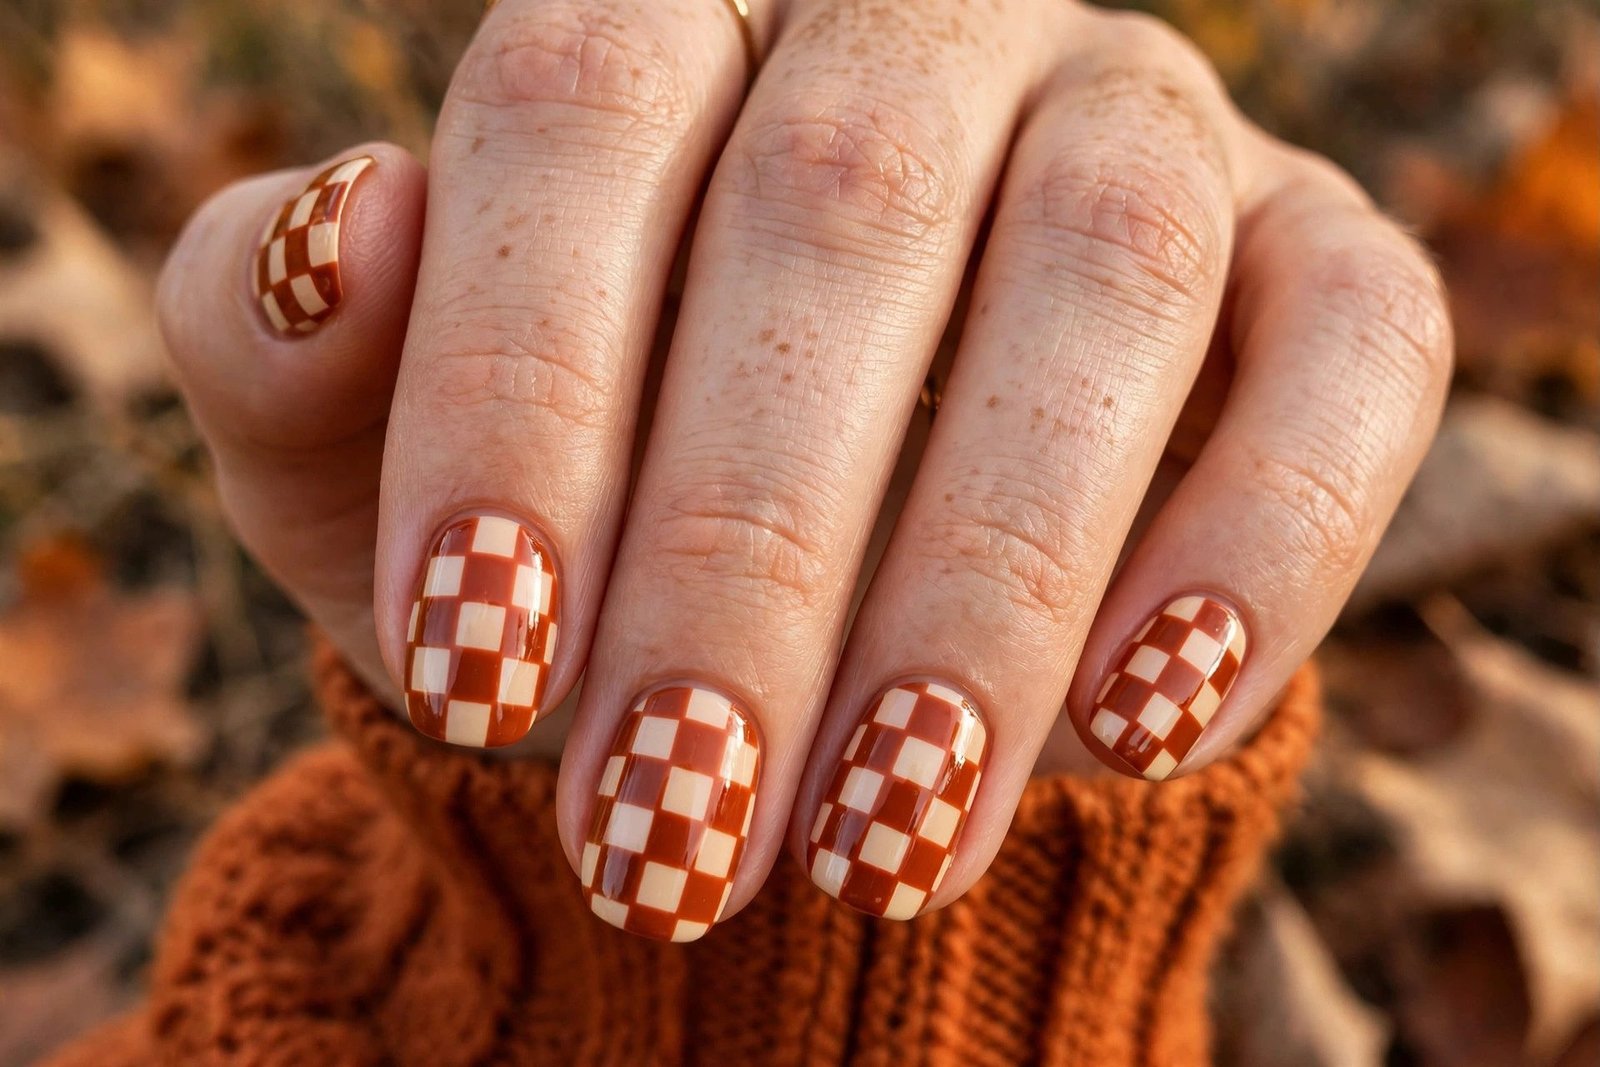
I paint a burnt orange and cream checkerboard for playful retro fall nails. Alternating squares in terracotta and warm cream — it looks like a vintage picnic blanket in the best way. Fun, graphic, very 2026. This suits short to medium nails; the small squares are perfectly scaled. I wear it to casual fall outings. My application tip: checkerboard needs a steady hand — I paint the cream base fully, then use a small flat brush for the orange squares, working in a grid. A striping brush helps keep square edges straight. Slight wobbles are fine at this scale. Let the cream dry completely before adding orange or the colors bleed. Glossy top coat sharpens the graphic look.
Burnt Orange With Gold Foil
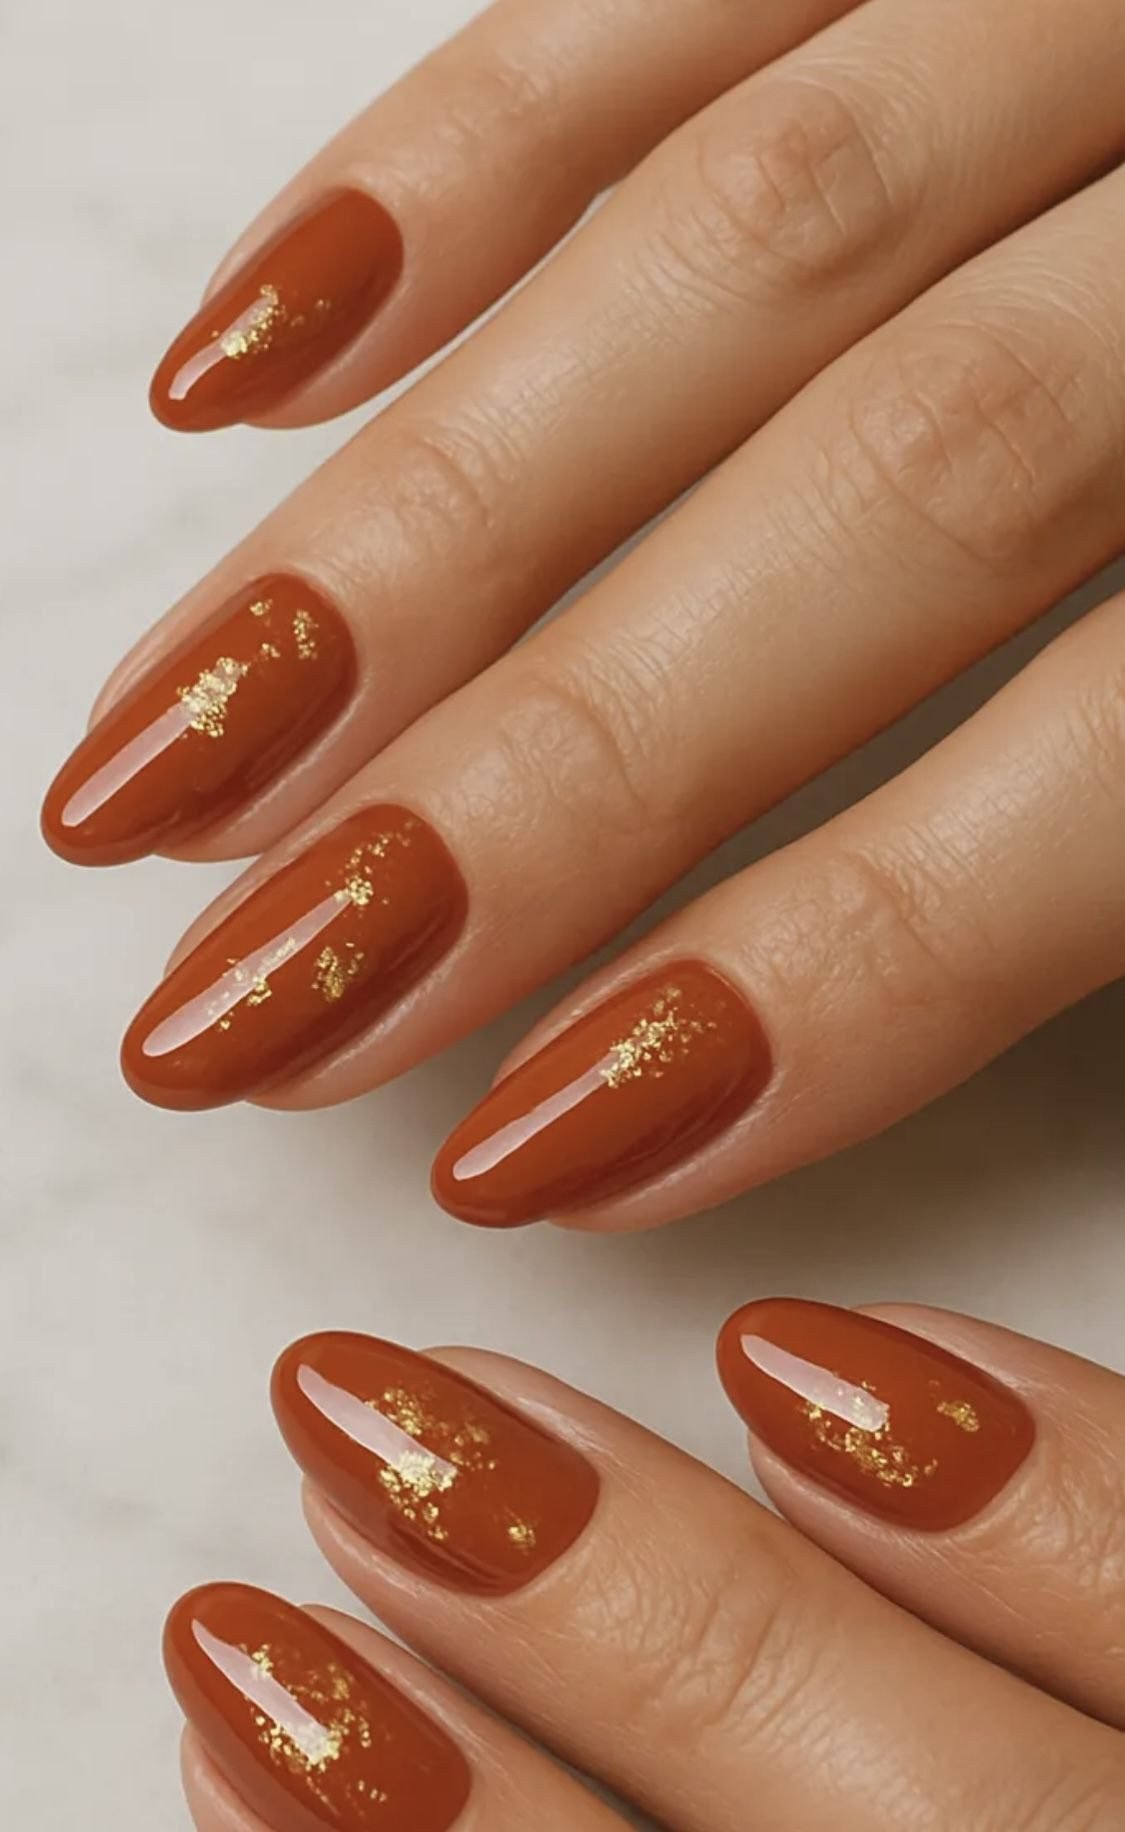
I press gold foil onto burnt orange for autumn luxury. The warm orange base with scattered gold flecks looks like fall leaves in sunlight — rich and festive. Each nail gets 3-5 small gold pieces. This suits medium nails and gold jewelry wearers. I wear it to Thanksgiving and fall dinners. My application tip: place the foil on tacky second coat with tweezers, clustering pieces asymmetrically for an editorial feel. Press flat with a silicone tool. The orange must be fully opaque first. Two top coats are essential — gold foil edges are sharp and will catch on everything without proper sealing. Keep the base glossy for maximum richness.
Abstract Terracotta Lines
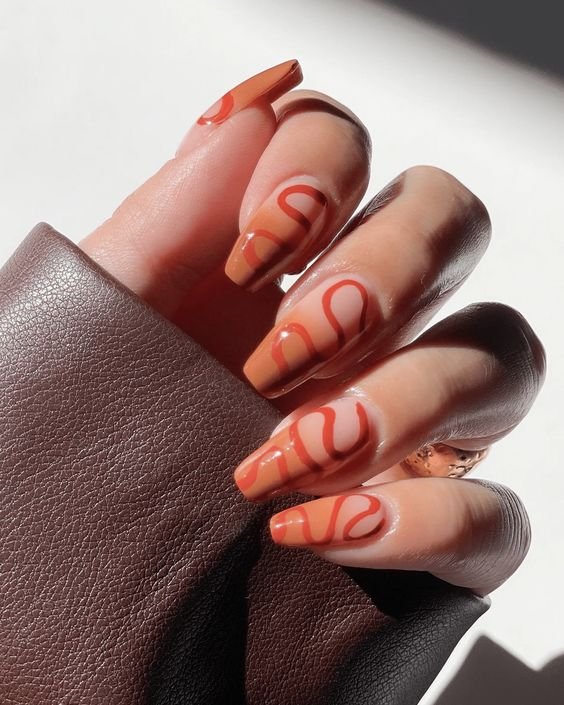
I paint abstract terracotta lines on a cream base for modern art-inspired fall nails. Warm cream base with freeform burnt orange curves, arcs, and dots — different on each nail, like a gallery wall. Minimalist but interesting. This suits short to medium nails; the negative space keeps it airy. I wear it to work and creative events. My application tip: use a striping brush and commit to each stroke — hesitation shows. I vary line weight by pressing harder on curves. Plan loosely but paint confidently; abstract art forgives a lot. Keep the orange lines thin on short nails. One glossy top coat smooths everything together.
Deep Ember With Gloss
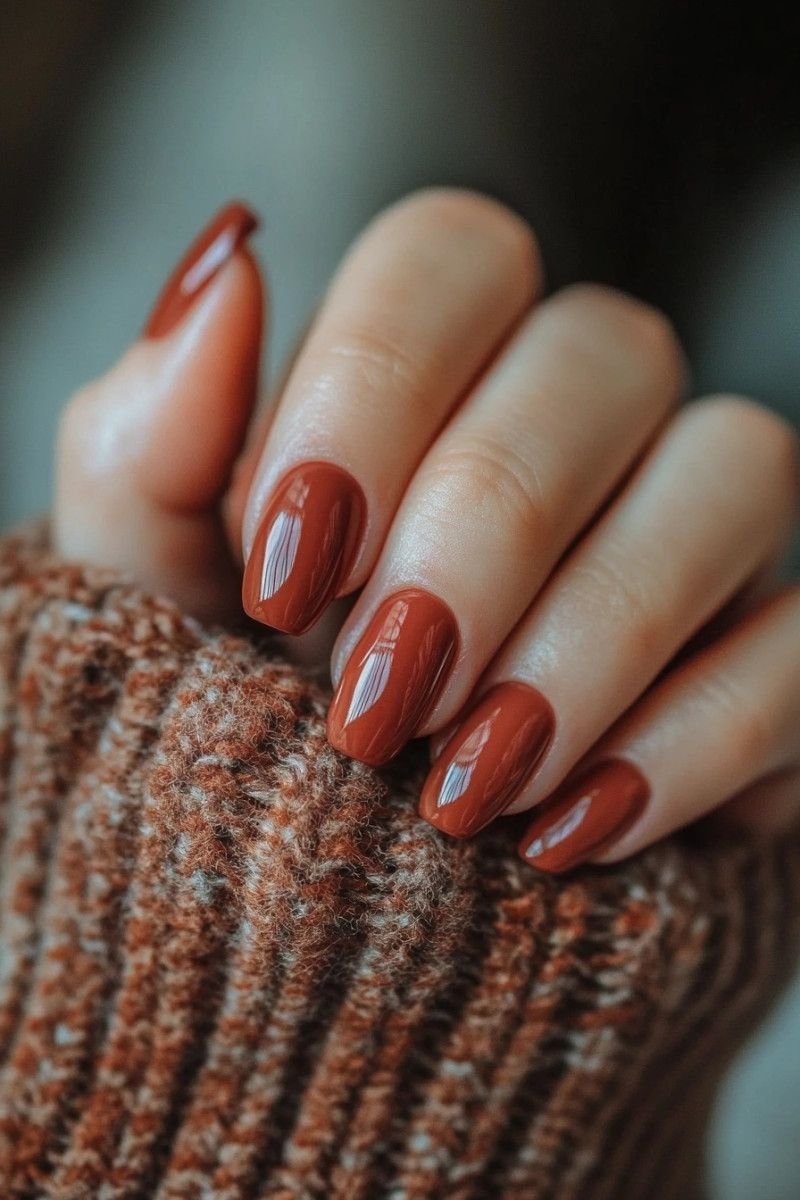
I wear deep ember — burnt orange leaning red — when I want the shade with extra drama. It's like burnt orange's moodier sibling: rich, glowing, almost oxblood-orange. Two coats of a well-pigmented crème, finished extra glossy. This suits medium skin tones beautifully and looks stunning on almond shapes. I wear it to fall date nights and evening events. My application tip: deep ember shows brush strokes, so I apply medium coats with minimal passes — don't go back over a stroke. The gloss level matters enormously here; I use a high-shine top coat and sometimes a second coat just on the tips. Dark warm shades stain, so base coat is non-negotiable.
Burnt Orange Animal Print
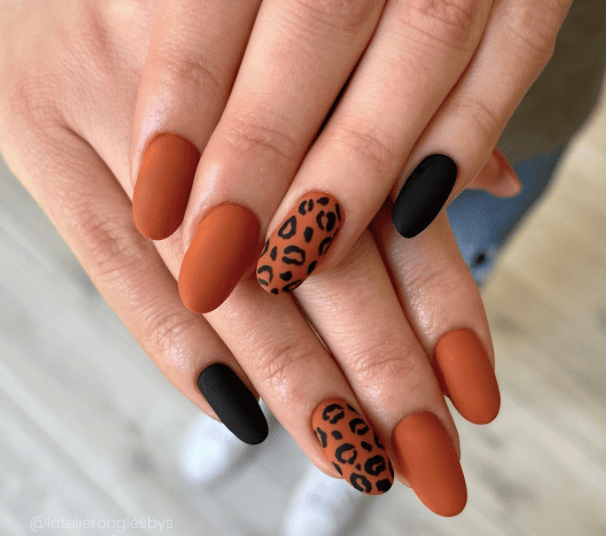
I do leopard print in burnt orange tones for fall's wildest nail. Terracotta base with dark brown irregular spots outlined in black — the classic leopard, warmed up for autumn. It's bold and I love it. This suits medium to long nails where the spots have room. I wear it to fall nights out. My application tip: leopard spots are irregular C-shapes and dots, not perfect circles — I paint broken outlines in dark brown, then fill some with black. Vary spot sizes across the nail. The terracotta base should be fully dry first. Keep spots away from the very edge so they don't get cut off awkwardly. Glossy top coat for that wild shine.
Two-Tone Orange and Brown
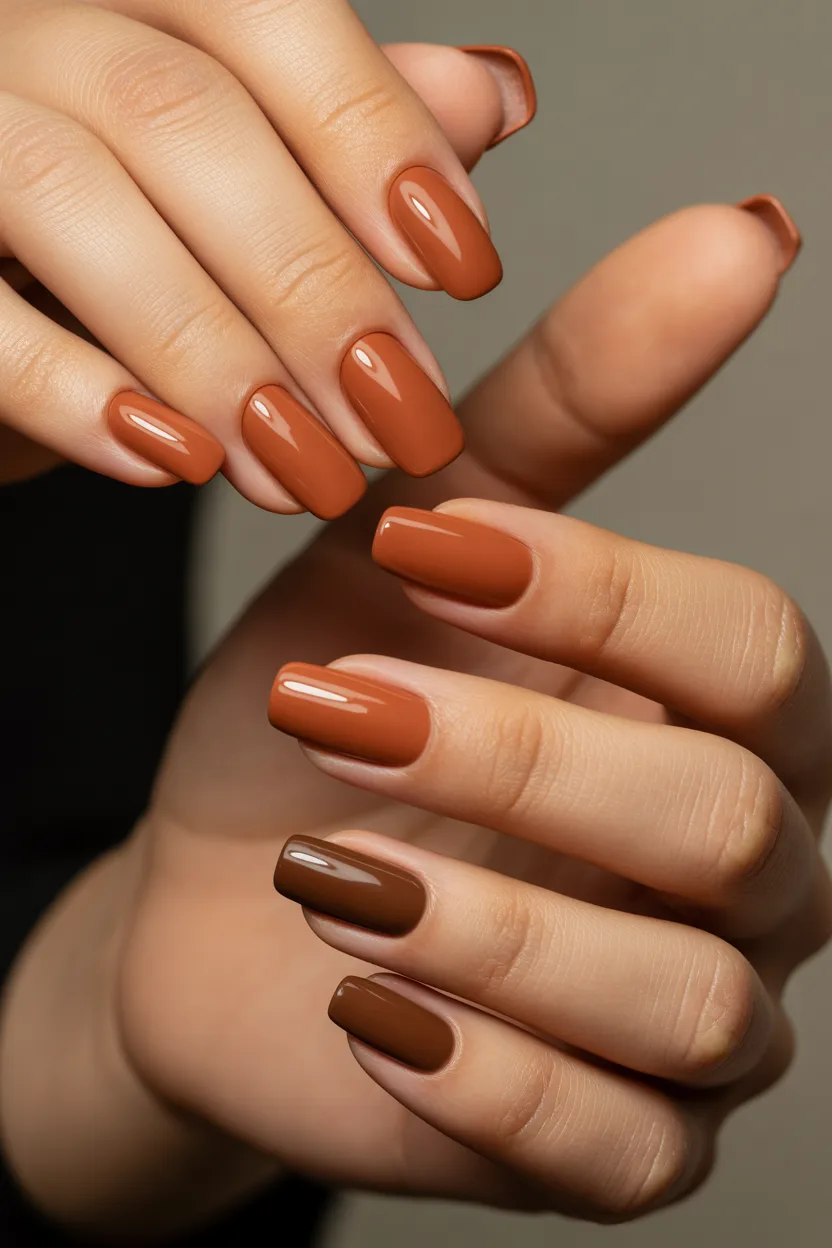
I wear two-tone burnt orange and chocolate brown — alternating nails or a diagonal split — for simple fall color-blocking. The warm pairing is effortlessly autumnal. Alternating solid nails is easiest; a diagonal split on each nail is more fashion-forward. This suits all lengths and anyone who loves color. I wear it as an easy fall manicure. My application tip: for the diagonal split, use striping tape on the dry first color — paint orange, let dry fully, tape the diagonal, paint brown, peel while tacky. The tape line must be crisp, so press the tape edge down firmly. Choose a chocolate brown with warm undertones to harmonize with the orange.
Burnt Orange Velvet
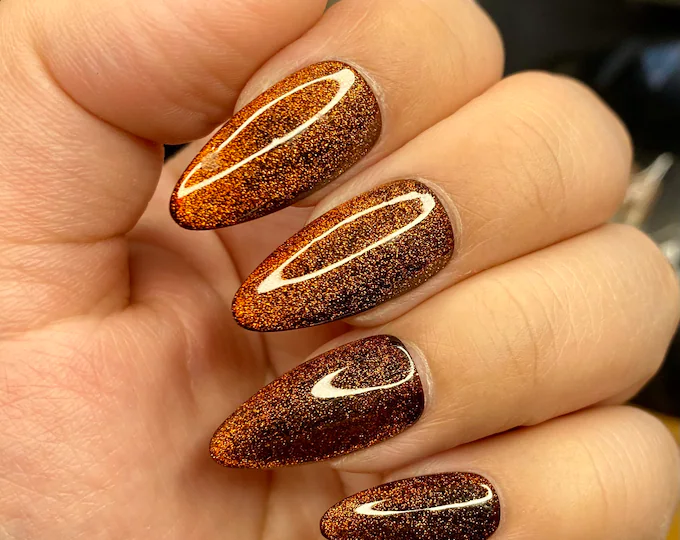
I use magnetic polish in burnt orange for a velvet cat-eye effect — the light shift looks like glowing embers. Copper-orange magnetic shade with the magnet held to create the velvet band. Mesmerizing in person. This suits medium to long nails where the effect shows. I wear it to fall evenings when I want something special. My application tip: apply the magnetic coat slightly thick so the particles can move. Hold the magnet 2-3mm above the nail for 10-15 seconds without touching — I prefer the straight velvet line pattern. Work one nail at a time since the effect sets as polish dries. Don't use matte top coat; gloss is what makes velvet glow.
Minimal Ember Dot Accent
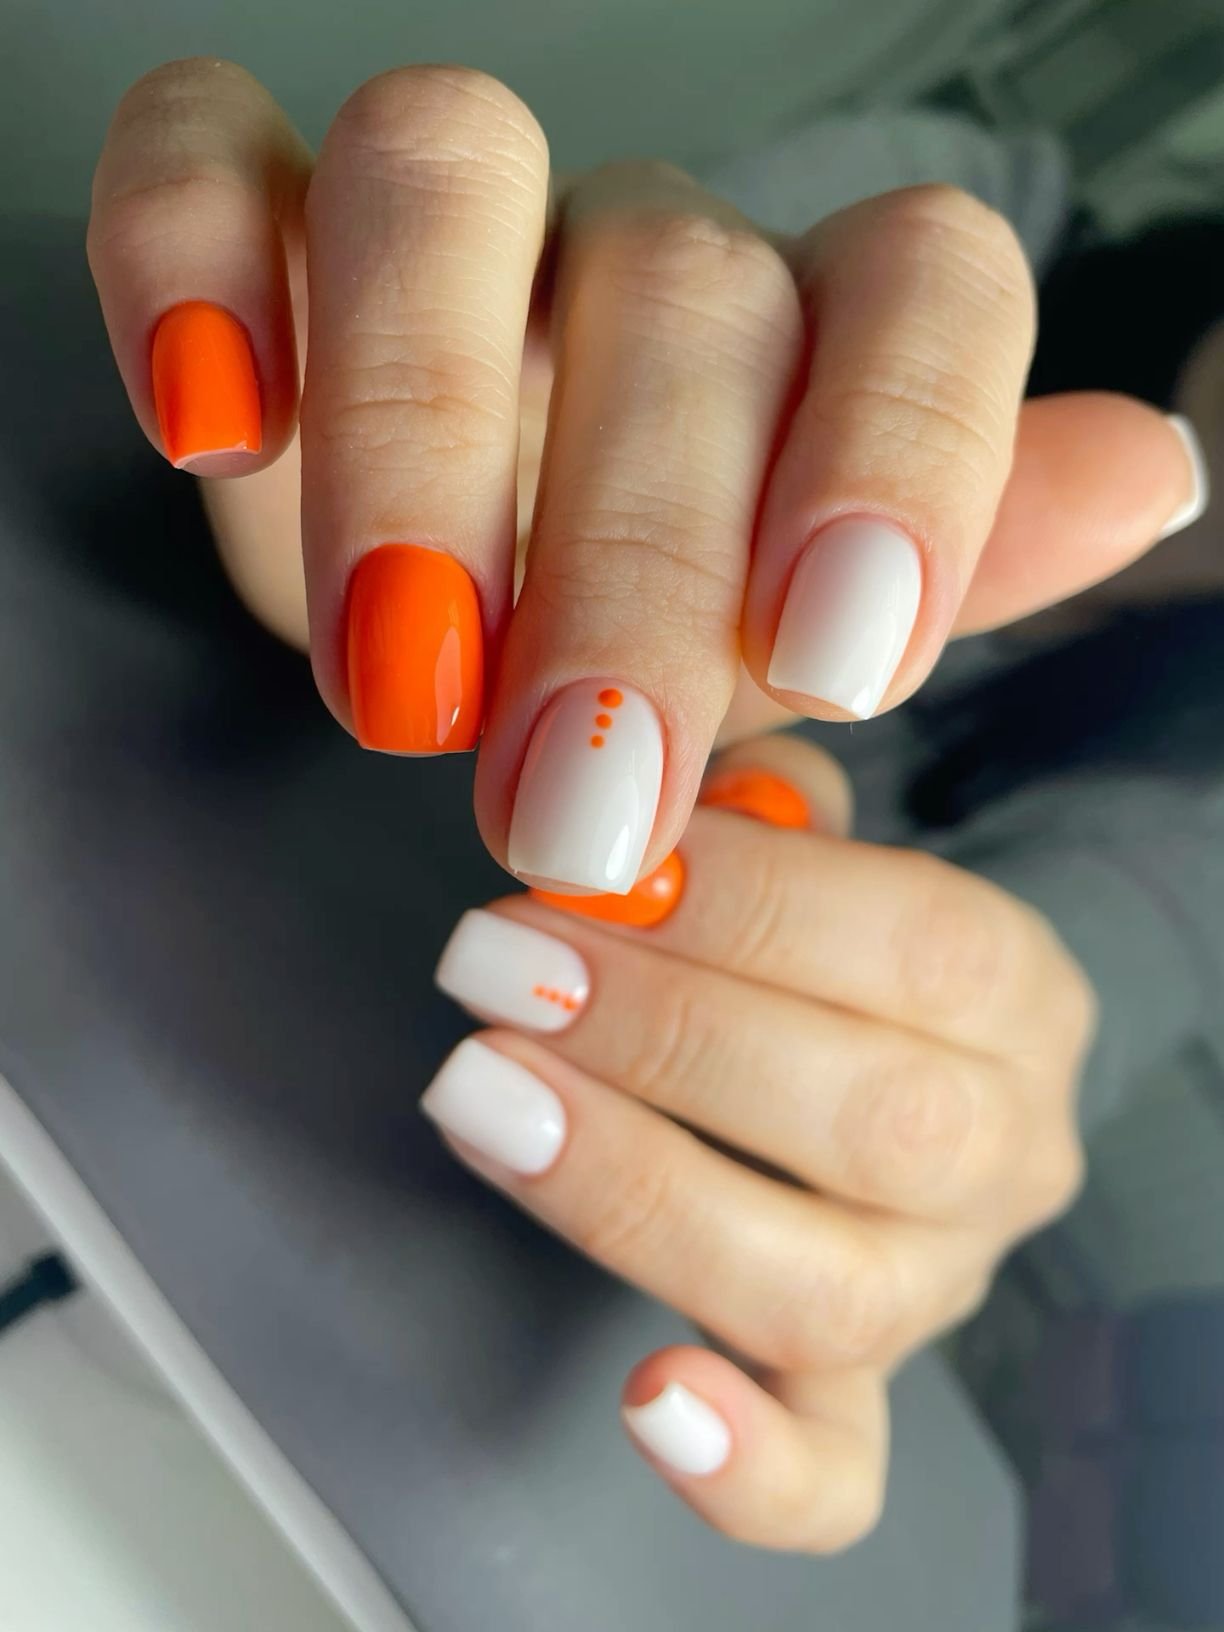
I add a single burnt orange dot to nude nails when I want the barest hint of fall. Sheer nude base on all nails, one small terracotta dot near the cuticle of each ring finger — that's it. Understated, chic, office-perfect. This suits short nails and minimalists. I wear it when I want seasonal nails that whisper. My application tip: the dot must be perfectly round and centered — I use a dotting tool with a medium head, wiping excess polish first. Place it about 2mm above the cuticle. The nude base should be even and sheer; patchy nude ruins the minimal look. One glossy top coat. Sometimes the simplest design is the hardest to execute cleanly — take your time with dot placement.
Burnt orange deserves better than one month a year — it's a fall-to-winter workhorse that flatters nearly everyone. My advice: start with the solid crème or the tortoiseshell if you're new to the shade, then branch into the marble and chrome once you're hooked. Save your favorite and wear it long past October; nobody will call it a Halloween nail.